- Magic Salt and Watercolor Snowflake Art
I’m not an artist – so trust me – if I can make this painting, it has to be pretty easy! I HAD to try this art project just because it’s fun. And cool. And sciency. (My browser is telling me that’s not a real word… haha) This salt and watercolor snowflake art project actually teaches you something, and I LOVE that!
I’ll be the first person to raise my hand and admit, “I can’t draw or paint”. And trying to make me do either of those two things will make me want to hide my head in embarrassment. (I’m shaking my head just thinking about how awkward I always felt in grade school art class!)
How to make Magic Salt and Watercolor Snowflake Art:
This art project is so perfect for a cold winter day! Here’s a list of affiliate links similar to the supplies I used:
- watercolor paper
2. watercolor paint
3. white crayon
4. paint brushes
5. table salt (just regular kitchen salt)
I cut each of my sheets of watercolor paper into 6 pieces. My watercolor paper is 9 x 12 inches (I linked to the exact paper I used in the list above), so each piece was cut to 3 inches x 4.5 inches.
You can definitely make bigger paintings if you want to! But I wanted to create a bunch of paintings, and I don’t have THAT much watercolor paper, so I was trying to conserve.
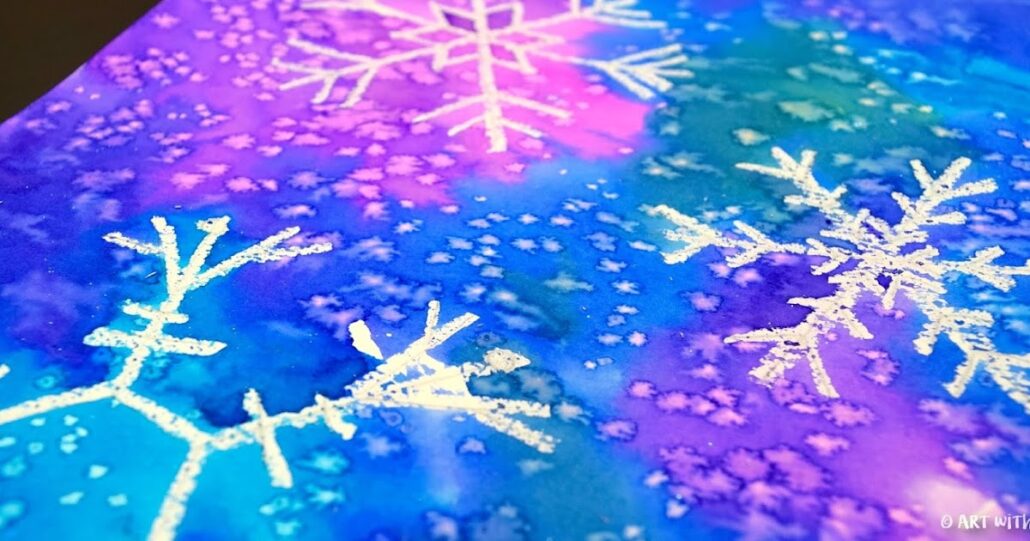
Now for the fun part. Use a white crayon to draw snowflakes on the watercolor paper. It’s reeeeally hard to photograph white crayon on white paper!? But if you tilt the screen away from you, you should be able to see the snowflakes in the image below.
Now for the fun part. Use a white crayon to draw snowflakes on the watercolor paper. It’s reeeeally hard to photograph white crayon on white paper!? But if you tilt the screen away from you, you should be able to see the snowflakes in the image below.
I used our red, purple and blue liquid watercolor paint. (Any type of watercolor paint should work.)
Mine says you can use 1 part liquid watercolor to 4 parts water, so I measured each one into a little salad dressing container. In case you’re wondering I measured 1/2 teaspoon of liquid watercolor and 2 teaspoons water for each of the three colours.
When you brush the watercolor paint over the paper, your snowflakes will magically appear! This step is pretty fun!
Cover the entire sheet of watercolor paper with paint. If you use small sheets of watercolor paper like we did, your paper will probably curl upwards a little bit. Don’t worry, it will flatten back out as the paint dries.
If the salt doesn’t stick to the painting, the paint is too dry. You’ll need to wet it with a little bit more paint, otherwise you won’t get the frost effect.
After the paint is completely dry, brush away the grains of salt and you’re done!
I’d love to hear your thoughts on this wintertime craft. Leave me a comment below and show me a picture of your finished product!


0 Comments