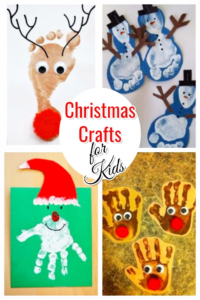
If you are anything like myself, you LOVE doing crafts with your kids…especially around the holidays. If you happen to be nostalgic, you can whip those babies back out year after year when the holiday season approaches and it will trigger fond memories of when your kids were the age they made the craft. I’m a sucker for the Hallmark Channel movies, hot cocoa with marshmallows and candy canes, decorating the tree with the most gaudy ornaments (but they are made by us and each one has a special place in my heart), the Santa experience, going to holiday gatherings, cookie decorating parties, etc. I can’t get enough of the Christmas spirit!
With all that being said, I thought I would share some of the Christmas crafts we have done in the past to help you get a good start on your own holiday decor. Feel free to comment below with your own ideas. I would love to add to our stash!
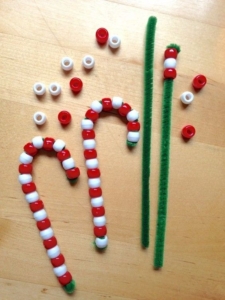
THE CANDY CANE ORNAMENT
This is so easy and the kids LOVE it! Not to mention this is GREAT for dexterity practice, fine motor skills, and pattern practice!
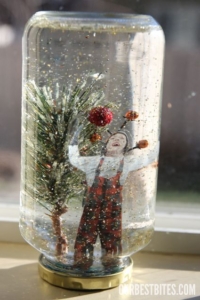
The Personalized Snow Globe
Head on over to this tutorial for the most adorable snow globe you won’t mind taking out year after year! https://ourbestbites.com/how-to-make-a-homemade-snow-globe//
Handprint Ornament
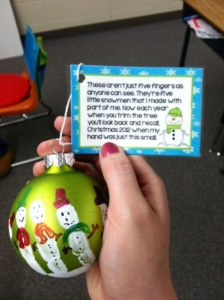
When I taught kindergarten, this was the craft I did every single year with my kids. The parents LOVED it! It is SUPER easy to do and truly mess free (besides a little paint). You take your child’s hand, paint it white, grab a colored ornament (I usually used a blue ornament) and have the child cup the ornament with their hand so that the top of the ornament is upright and not in their hand. Slowly take the ornament out of their hand and wait for it to dry. Once dry, use Sharpie marker to “decorate” each fingerprint as a snowman like shown in the picture below.
Door Decorations
I have 3 little girls so I LOVE this idea! How easy is this?!?

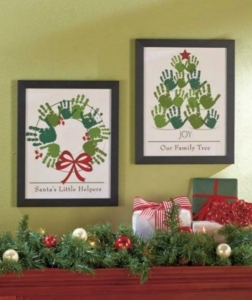
Handprint Wreath
How adorable would it be to hang up a wreath made with your kids’ handprints and footprints?!? Soooo easy and quite ADORABLE!

Christmas Tree Decorations
Grab some pine cones, a little paint, some glitter (don’t be afraid of glitter), some Skittles, and some glue…and VOILA!

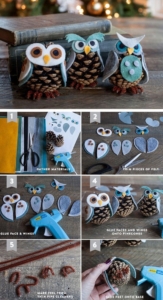
Christmas Owl Craft
If you are not the Christmas tree/ snowman/ Santa/ Etc. decoratoe but still like to decorate for the holiday season, try out these precious owls that are sure to spice up any room.
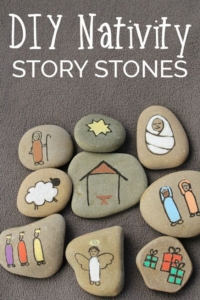
Nativity Story Stones
What a great way to retell the story of why we celebrate Christmas in the first place. A little paint, some smooth stones and BAM, you have a fun activity you can do over and over again with the little ones.
Salt Dough Ornaments
These are a classic and if you have never made one of your child’s foot or hand, they are SUPER easy and forgiving if you make a mistake. Don’t buy the kits (save your money), these are easy to make and you most certainly have the ingredients on hand in your kitchen cabinet.
Ingredients Needed to Make This Salt Dough Ornament Recipe
– 4 cups Flour
– 1 cup Salt
– 1.5 cups Water (maybe a little more)
– Christmas Cookie Cutters
-Mod Podge
-Twine or decorative string for the loop to hang it
How to Make Salt Dough – Ornament Recipe
1. Preheat your oven to 200 degrees Fahrenheit. Adults will need to do the baking part, but kids can help decorate!
2. Combine your flour, salt and water and mix well. Knead for 10 minutes. If your dough is too dry, add a little bit more water. If it’s too sticky, add a little bit of flour. It will help to place flour down on your surface when kneading and on your hands.
3. Once you’re done kneading, roll out the dough to about 1/2 cm thickness. The thinner you make the ornaments, the better they will thoroughly bake and dry through.
4. Using your Christmas cookie cutters, cut out different shapes for your salt dough ornaments. I use large cookie cutters so I can fit the handprint of my baby in there.
5. Using a straw, make a hole in the top of the ornament for where you would like the twine to hang. This is also the time to make your child’s foot or hand imprint.
6. Bake for 1-2 hours. If your ornaments are not completely dried through when you pull them out put back in for another hour. The baking time will vary greatly depending on the size and thickness of your ornaments. Larger ornaments will take longer whereas smaller ornaments will take less time. You can also let them air dry for a day before baking and this will cut down on the baking time.
If you notice puffing when baking, it is likely because the ornaments are too thick. In this case, let them air dry for a few days before baking.
7. Now you’ll want to seal before adding your glitter. Make sure your ornaments are completely dried through before sealing. Spray with a clear glaze spray (adults only) or finish with Mod Podge.
8. Now add clear glue on top of your ornament and shake glitter on top until you fill the ornament with glitter. Kids will love helping with this part!
Once you’re done, add your gold twine for hanging them on the tree.
These have to be our favorite salt dough ornaments we’ve made and they look great on the Christmas tree! This salt dough ornament recipe is the best we have tried – if you have any questions feel free to leave a comment below and we can help you!



0 Comments